Canva Integration Inside GHL Media Storage
GoHighLevel Introduces Canva Integration Inside Media Storage: A Smarter Way to Manage Creative Assets
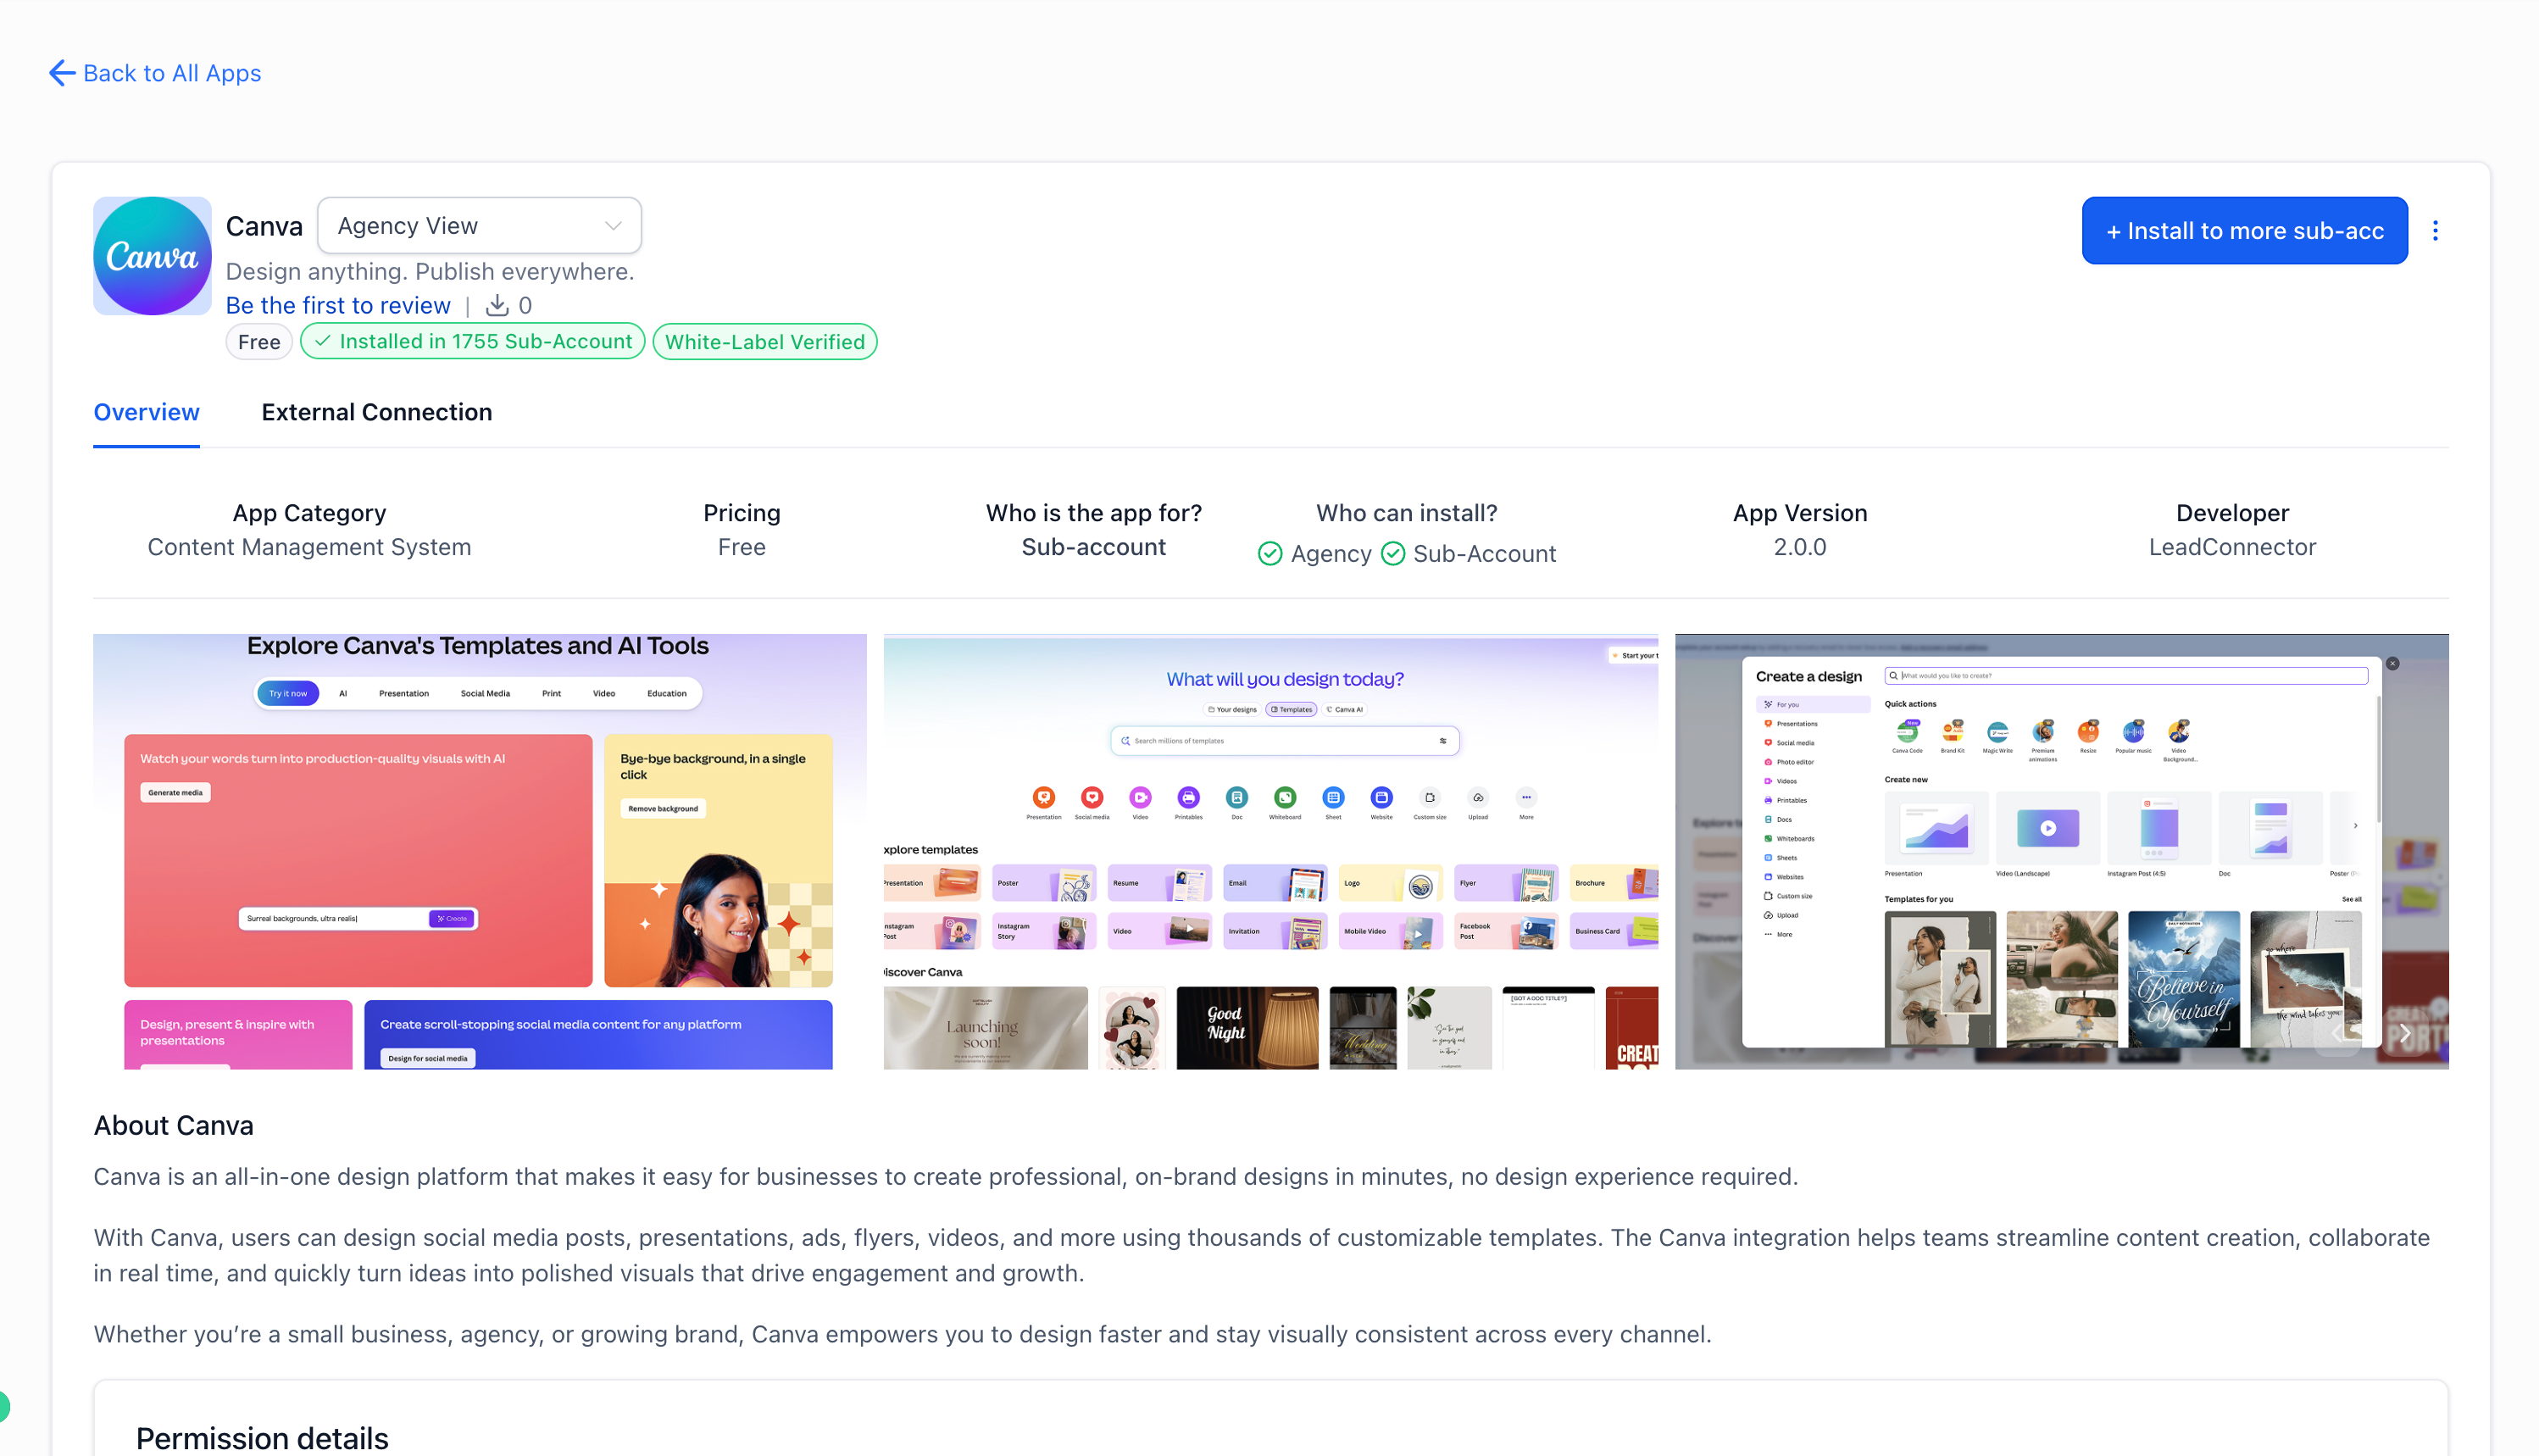
GoHighLevel continues to expand its ecosystem with tools that simplify how businesses manage marketing operations. One of the newest additions to the platform is the Canva integration inside Media Storage, a feature designed to streamline creative workflows for marketers, agencies, and business owners.
With this update, users can now connect Canva directly within GoHighLevel’s Media Storage environment. This eliminates the need to constantly switch between platforms when creating, editing, and uploading design assets.
For businesses that rely heavily on visual content such as social media graphics, ad creatives, landing page images, and email visuals, this integration significantly improves efficiency and organization.
This article explores how the Canva integration works, how to set it up, and why it matters for agencies and businesses using GoHighLevel.
What’s New in the Canva Integration:
The latest GoHighLevel update introduces the ability to connect a Canva account directly inside Media Storage. Once connected, users can access Canva assets without leaving the GoHighLevel interface.
This integration allows users to:
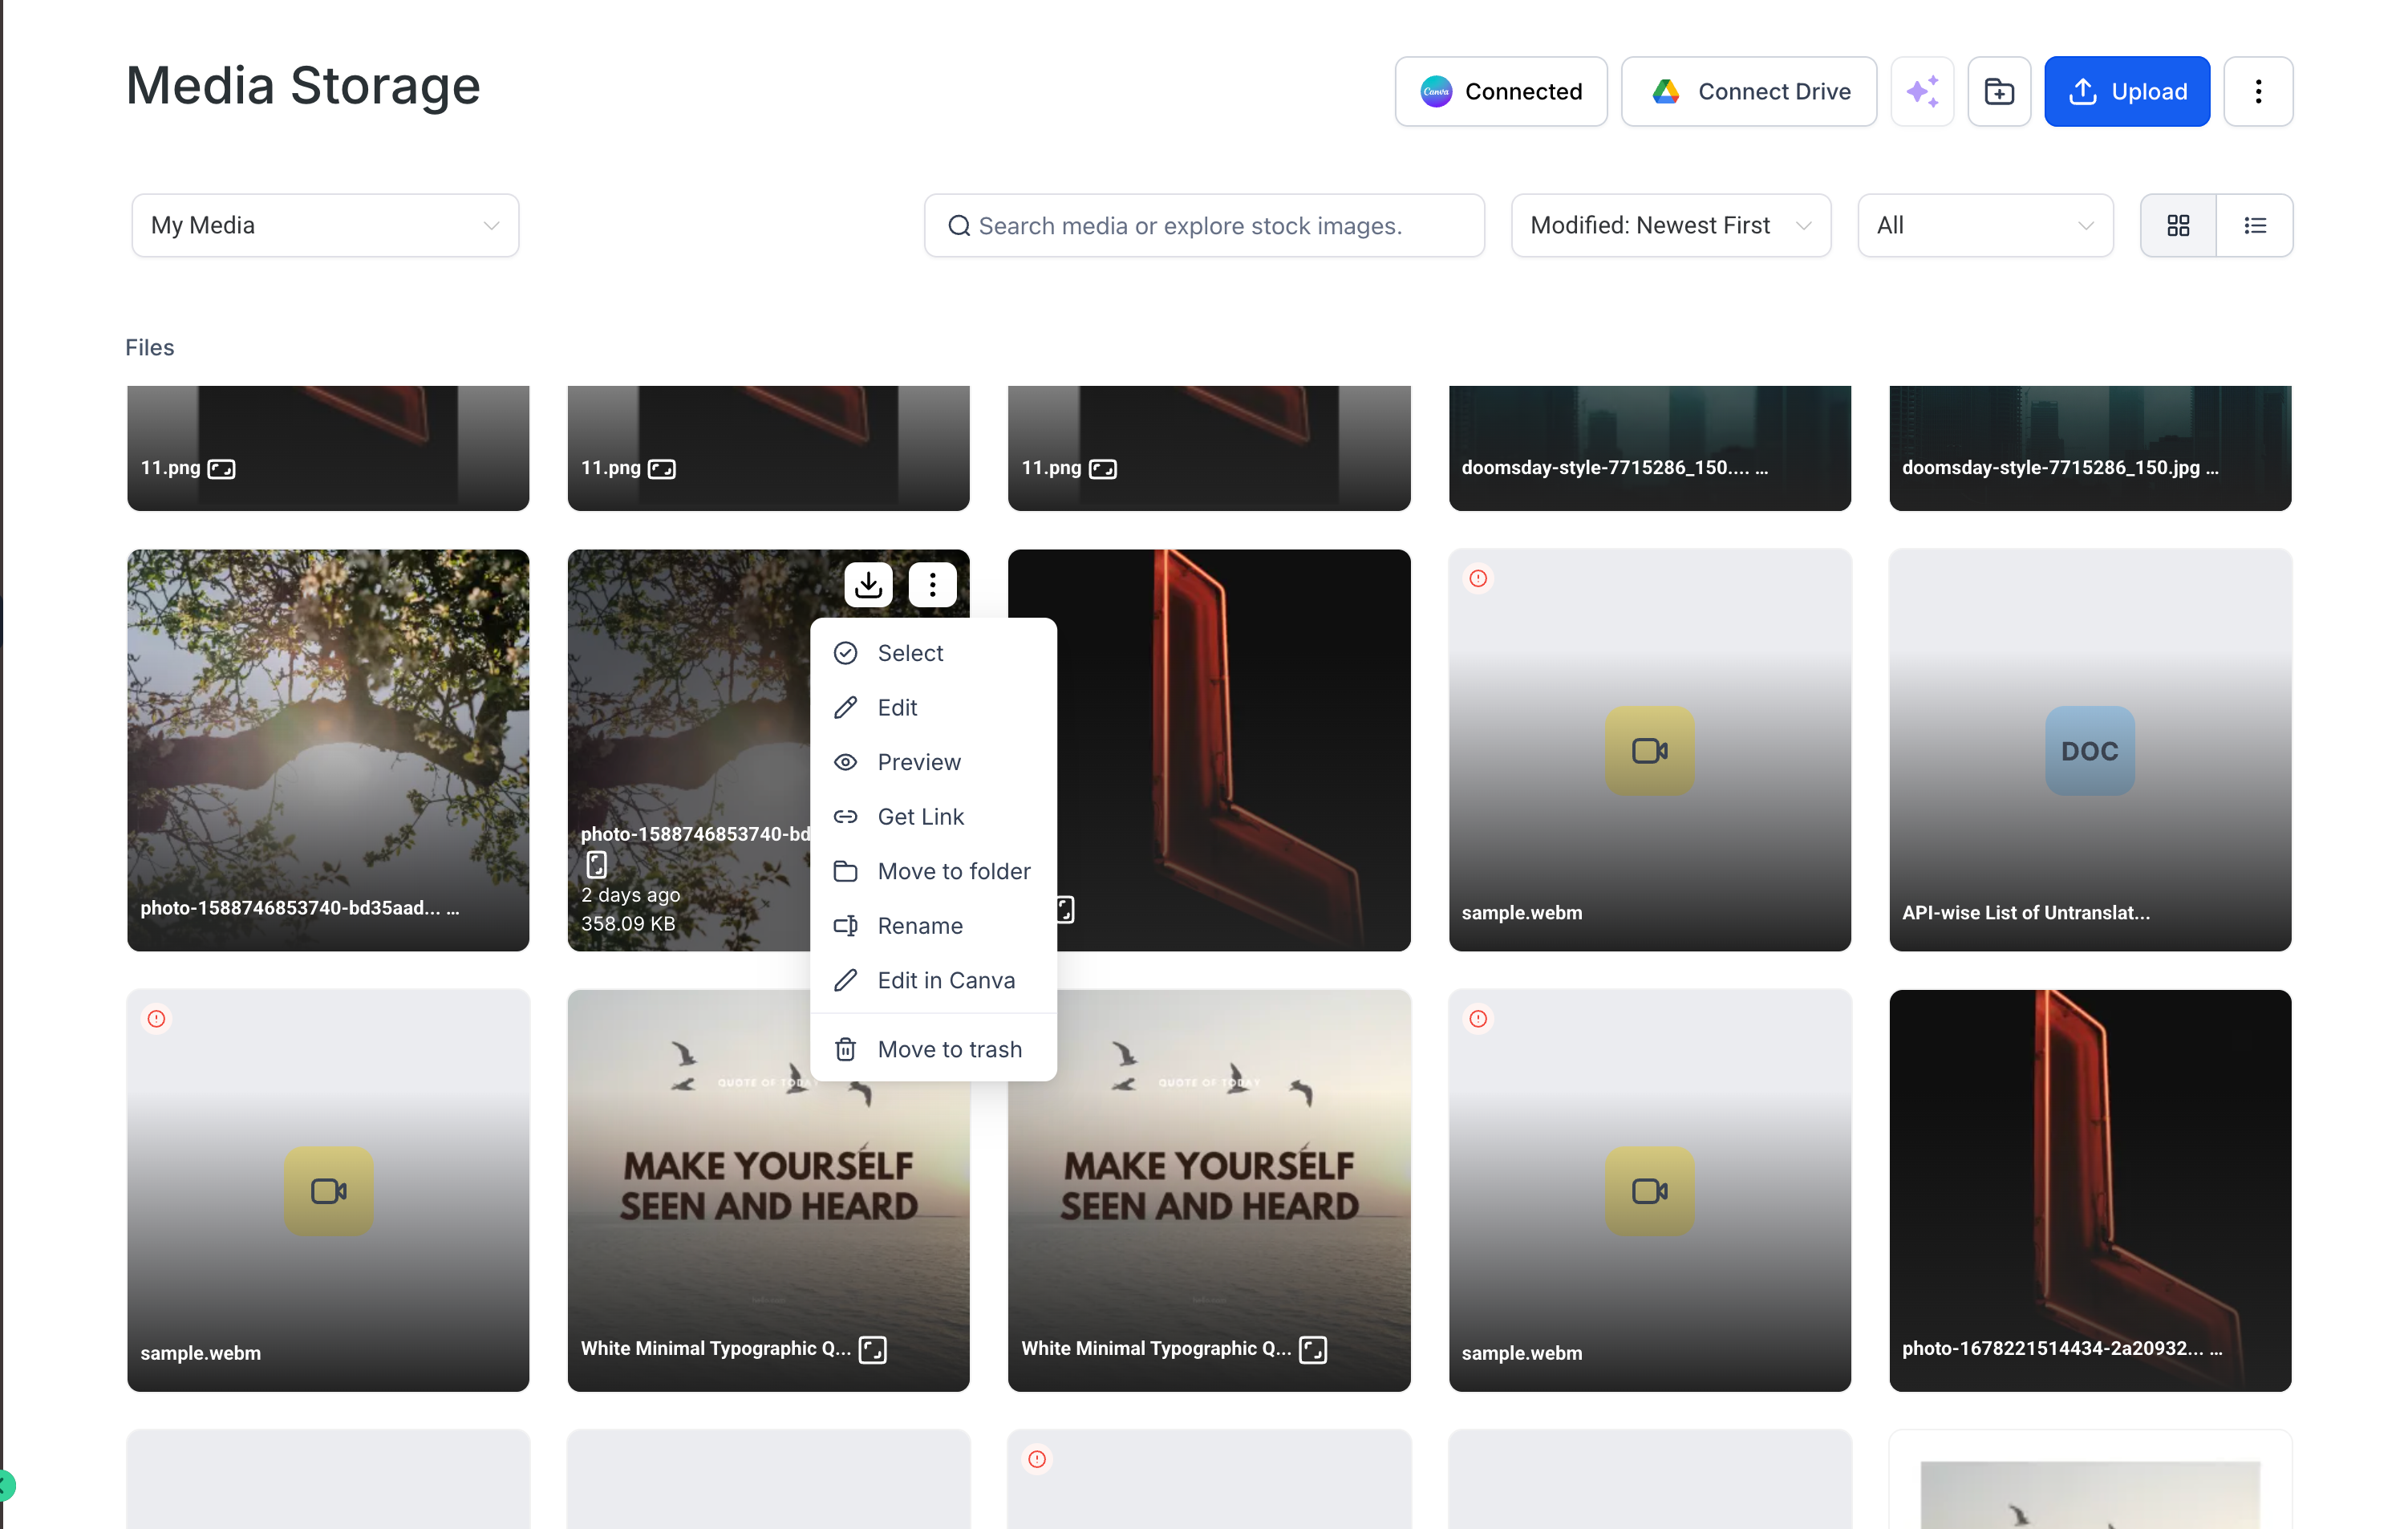
Browse Canva designs directly within Media Storage
Edit existing assets in Canva
Download Canva files into GoHighLevel
Import designs into My Media
Manage design files without switching browser tabs
Previously, users needed to design assets in Canva, export them manually, download the files, and then upload them to GoHighLevel before using them in funnels, websites, emails, or automation campaigns.
The new integration removes these extra steps and allows teams to work more efficiently from a single interface.
How the Integration Works:
The Canva integration is designed to operate at the location (sub-account) level inside GoHighLevel.
This means that each sub-account can connect one Canva account. Once connected, the Canva library becomes accessible within the Media Storage system.
Key operational details include:
Canva connects to a specific location within GoHighLevel
Only one Canva account can be connected per location
All users within that location can view available assets
Proxy users using the “Login As” feature cannot access Canva assets
This approach ensures proper control and security over design assets while still allowing collaboration among team members working within the same sub-account.
How to Connect Canva to GoHighLevel:
Setting up the Canva integration is a straightforward process and can be completed in just a few steps.
Step 1: Connect Canva from Media Storage
Navigate to Media Storage within your GoHighLevel account and open the Canva tab. From there, select Connect to begin linking your Canva account.
Step 2: Install Canva from the App Marketplace
Alternatively, users can install Canva directly from the GoHighLevel App Marketplace. Once installed, the integration becomes available inside Media Storage.
Step 3: Complete OAuth Authorization
After initiating the connection, GoHighLevel will prompt you to authorize access through Canva’s OAuth authentication system. Once authentication is completed, Canva designs will automatically become visible inside Media Storage.
This process ensures secure access while allowing GoHighLevel to retrieve design files from the connected Canva account.
Editing Canva Designs Directly Inside GoHighLevel:
One of the most valuable aspects of this integration is the ability to edit Canva files without leaving GoHighLevel.
Users can access Canva editing tools directly through Media Storage using the following process:
Locate the asset in the Canva tab within Media Storage
Click the three-dot menu next to the file
Select Edit in Canva
Make design changes in Canva
Import the updated version back into GoHighLevel
Once the updated file is imported, it becomes available for use across funnels, emails, websites, and other marketing assets within the platform.
This eliminates repetitive download and upload steps that were previously required.
Editing Files from “My Media”:
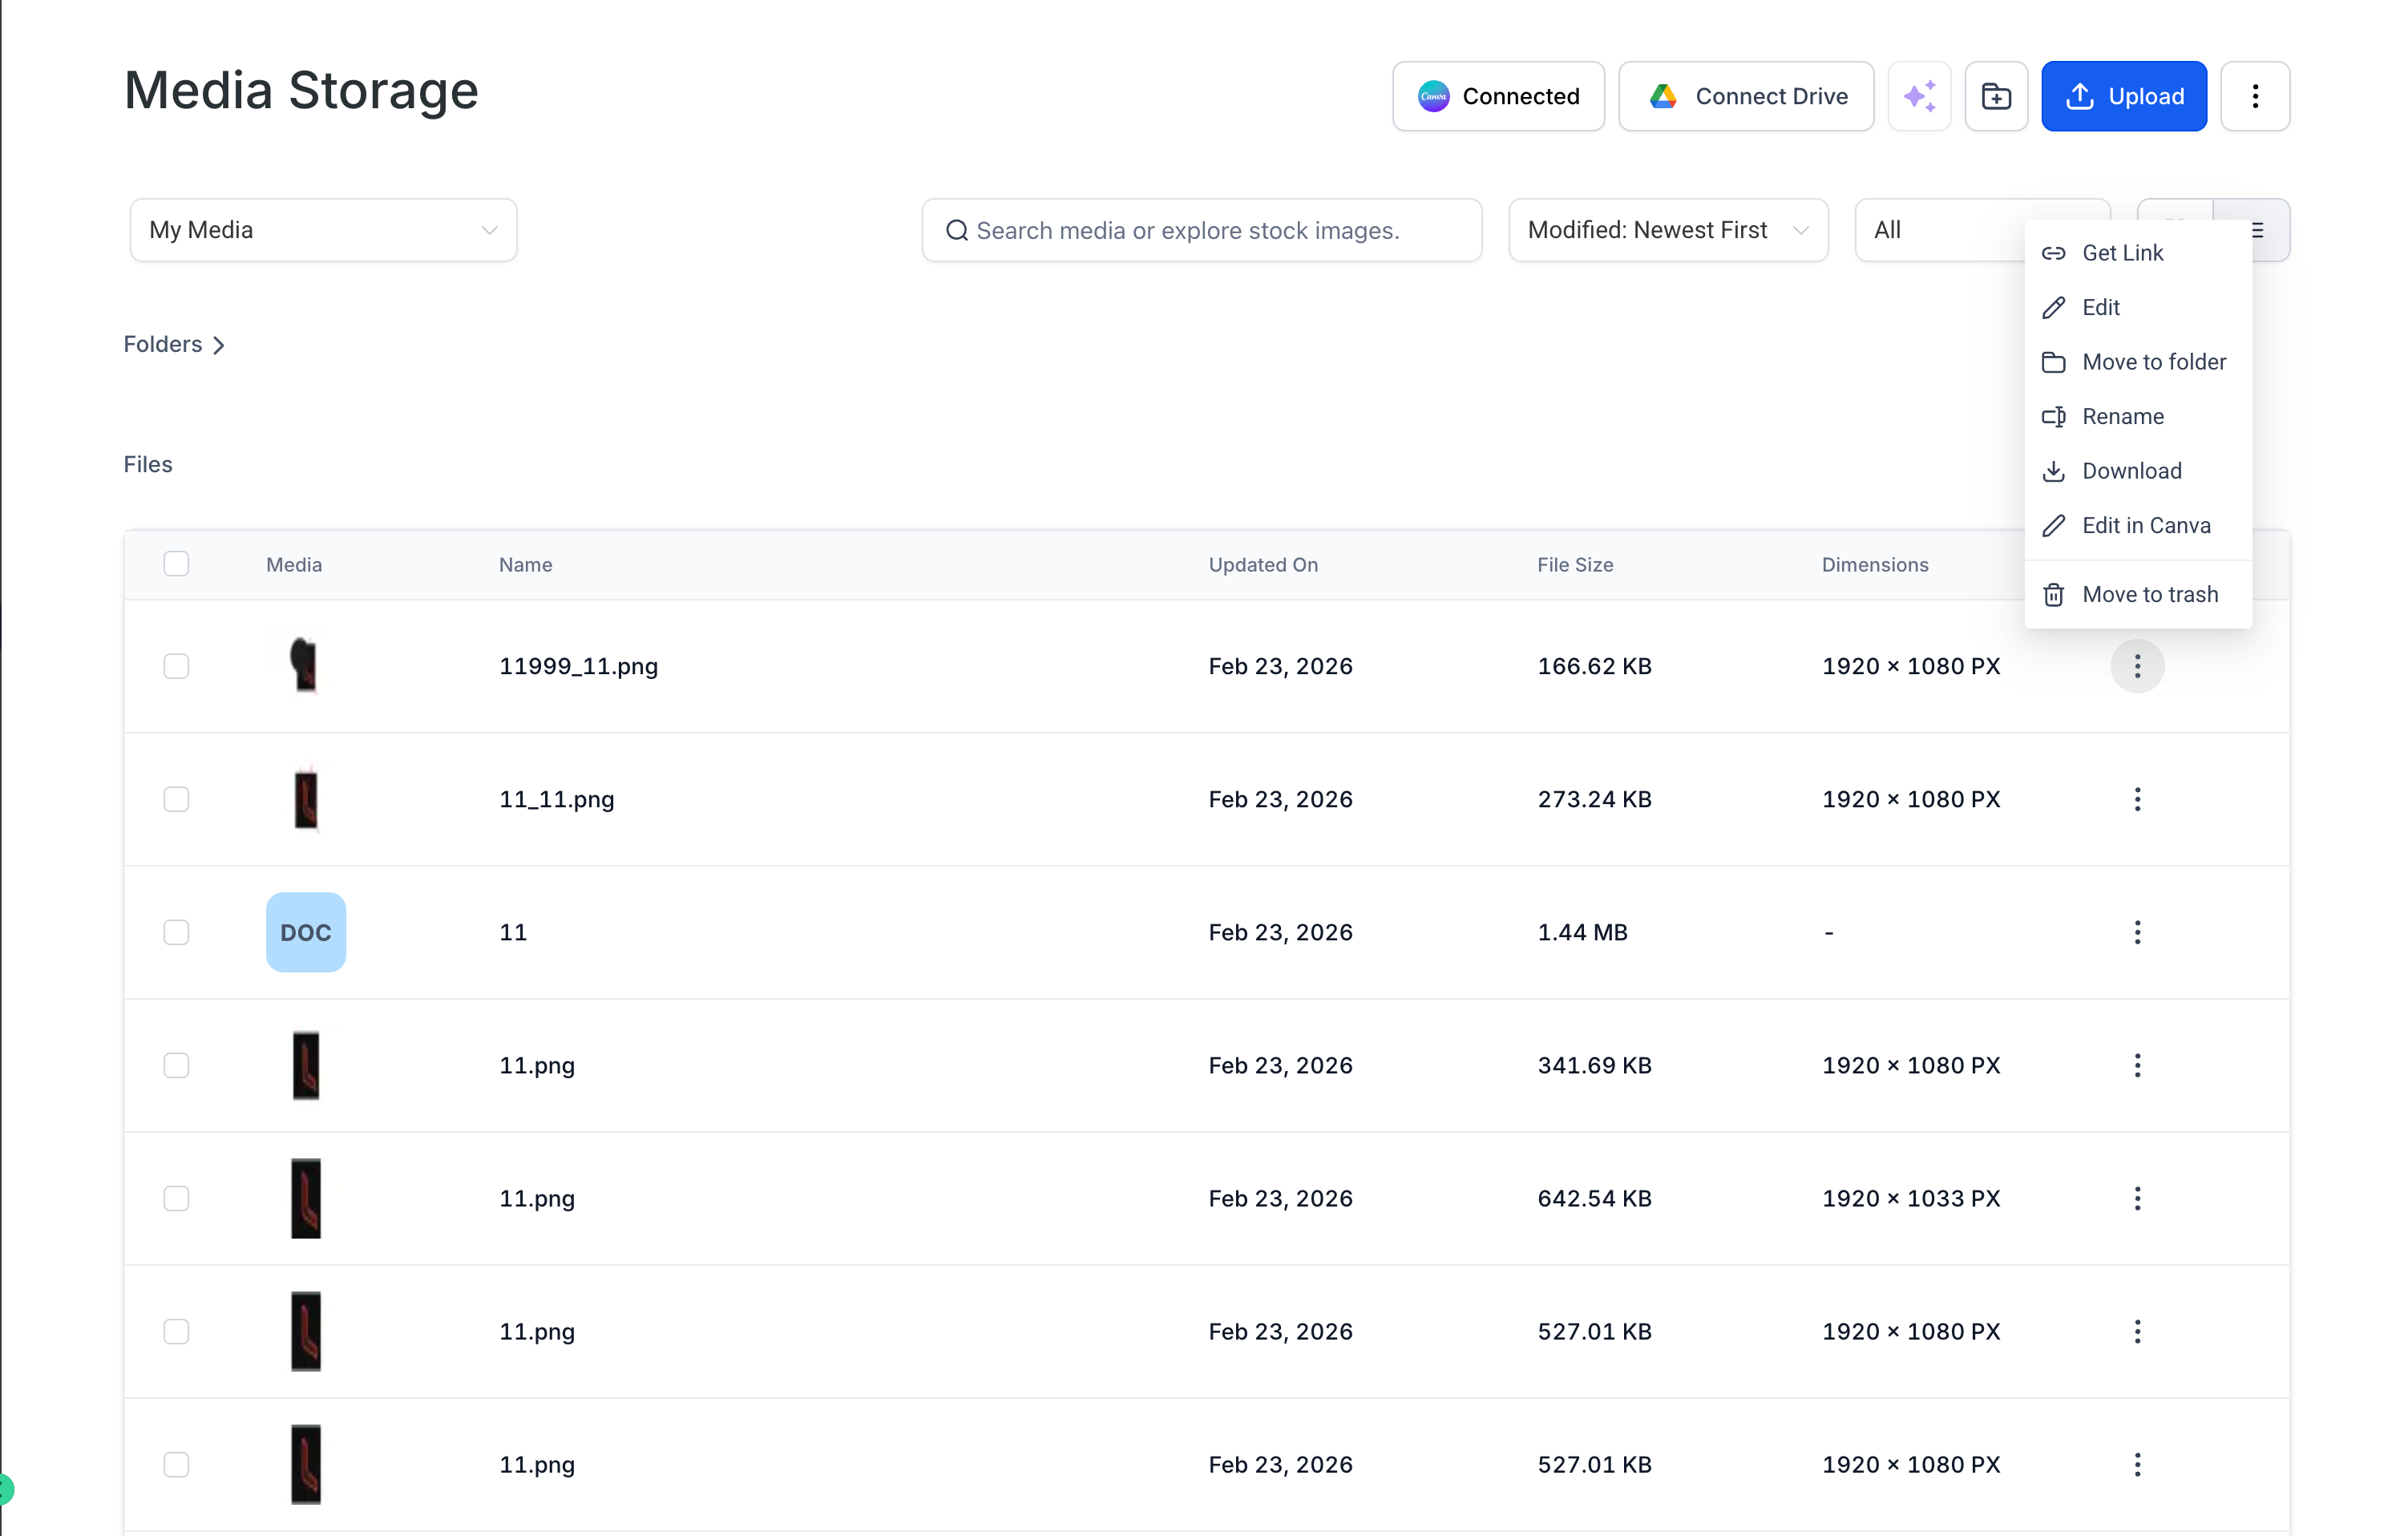
The integration also supports editing images directly from the My Media section of Media Storage.
This feature currently works for the following image formats:
PNG
JPG
JPEG
To edit a file:
Select the image in My Media
Click Edit in Canva
Make modifications inside Canva
Re-import the updated version into Media Storage
The system ensures that the updated file replaces or updates the existing version without creating unnecessary duplicates.
Smart Design Tracking:
To further improve file management, GoHighLevel introduced Smart Design Tracking within this integration.
This feature prevents duplicate Canva files from being created when editing assets that already exist in Media Storage.
For example, if a user edits a design originally imported from Canva, the system recognizes the connection between the file and its Canva source. Instead of creating a completely new file, it updates the existing asset.
This helps maintain a cleaner and more organized media library.
Permissions and Access Control:
The Canva integration includes permission controls to ensure that design access is managed appropriately within teams.
Here is how permissions are structured:
Installer Permissions
The user who installs the Canva integration has full editing access. This user can connect the Canva account, modify assets, and manage the integration settings.
Other Users
Other users within the same location can:
View Canva assets
Search designs
Download files
Import assets into Media Storage
However, they may not be able to edit Canva files unless they have appropriate permissions.
If a user without editing privileges attempts to modify a design, the system displays a notification:
“You have view-only access to this media. To make changes, import it into your own storage or reach out to your admin for access.”
This helps prevent unauthorized modifications while still allowing teams to access shared assets.
Why GoHighLevel Built This Integration:
Marketers and agencies frequently use Canva to create graphics for ads, social media posts, landing pages, email campaigns, and promotional materials.
However, before this integration, the workflow required multiple manual steps:
Create design in Canva
Download file to computer
Upload file into GoHighLevel
Organize it inside Media Storage
Use it in funnels or emails
This repetitive process created friction, especially for teams producing large volumes of creative assets.
The Canva integration solves this problem by allowing users to:
Access designs instantly
Edit graphics without leaving the platform
Import files directly into Media Storage
Manage assets from a centralized location
The result is a faster and more efficient creative workflow.
Important Notes for Users:
There are a few limitations and considerations users should be aware of when using this integration.
One Canva Account Per Location
Each GoHighLevel location can connect only one Canva account. If multiple team members use Canva, they must coordinate access through the connected account.
Files Must Be Imported Before Use
Designs accessed through the Canva tab must first be imported into Media Storage before they can be used in funnels, websites, or email campaigns.
Private Canva Files
Certain private Canva files may not be editable depending on the account’s sharing permissions.
Disconnecting Canva
If the Canva integration is removed through the App Marketplace, previously imported files will remain in Media Storage and continue to function normally.
